
")
If you have a persistent issue with your PC that you have been unable to fix, the best option is to usually to reset your operating system. This will give you the option to keep your files (refresh), remove everything, or perform a factory reset. We’ll be showing you how to factory reset Windows 11 and Windows 10 today so that you can return your PC to its normal functioning.
A factory reset Windows 11 and Windows 10 does a full factory restore on a PC that came pre-installed with the OS. This is usually only an option if your device came from an Original Electronics Manufacturer (OEM) such as HP, Dell, or Lenovo. It will take you back to the version of Windows that was installed at that date while removing all of your apps, files, drivers, and settings changes. It will also reinstall any apps your manufacturer bundled with the PC.
Computer refresh vs. factory reset of Windows 11
Advertisement
The “Keep my files” option performs a Windows 10 or Windows 11 refresh instead. This will let you keep your accounts and personal files, but will still remove apps, drivers, and settings changes. “Remove everything”, meanwhile, deletes all accounts, personal files, apps, drivers, and settings changes.
We’ll be showing you how to factory reset Windows 11 and Windows 11 via two methods: Using the boot menu and Windows settings. We recommend the latter if you still have access to your PC’s UI, but you can use the former if you can’t access your OS at all.
How to Factory Reset Windows 11 from Boot
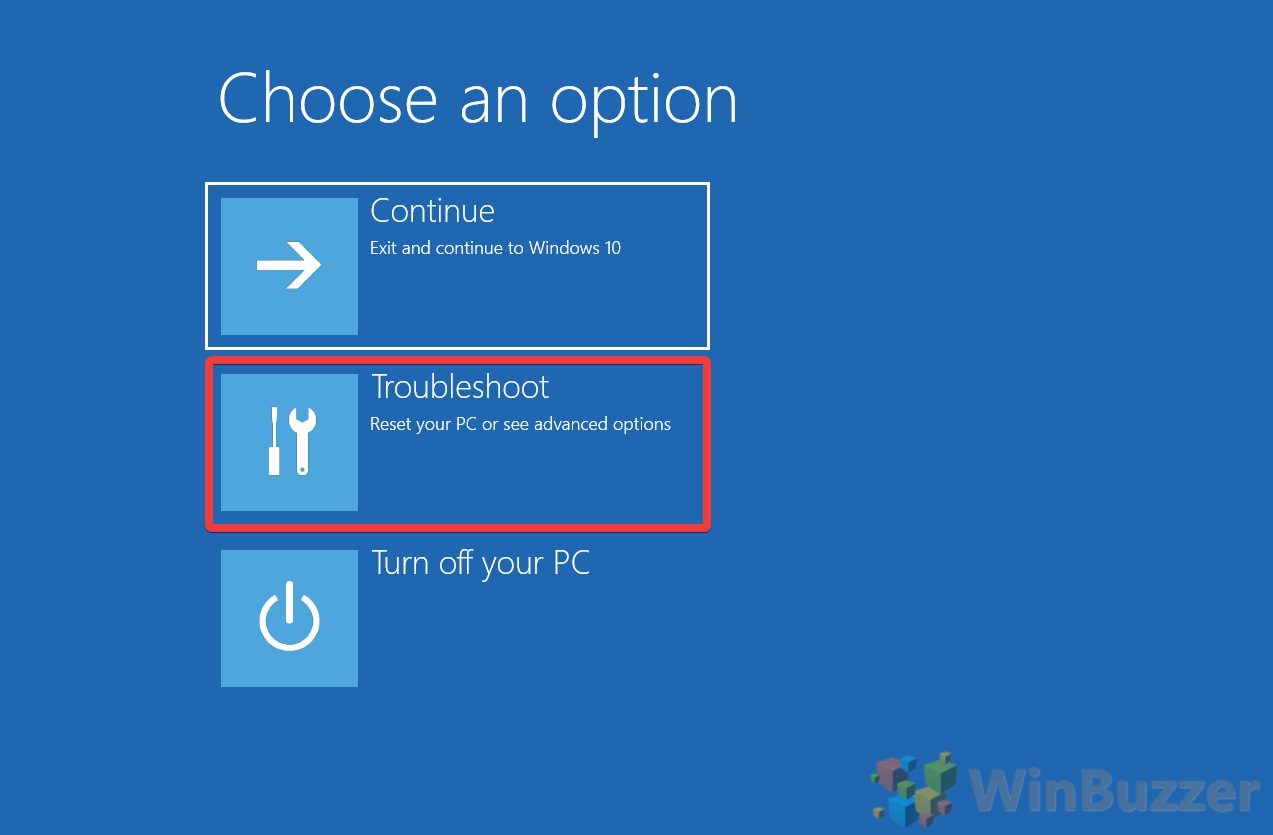
If your operating system won’t load normally, a Windows 11 factory reset from boot is your best choice. This way, you only need to access advanced startup options. If you can access your OS, you’ll be able to do this quite easily. If you can’t, you’ll need a recovery drive or installation media before you continue. Once you’re in advanced startup options, and make a backup of your files (if possible) follow the steps below:
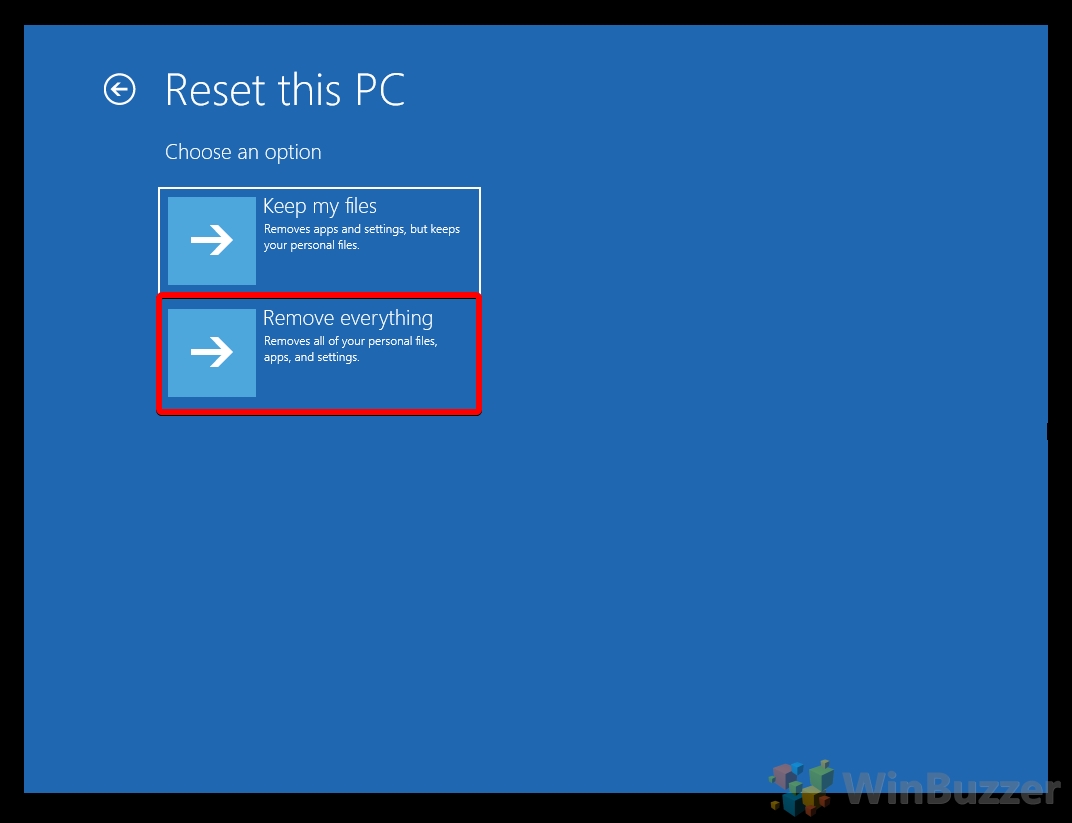
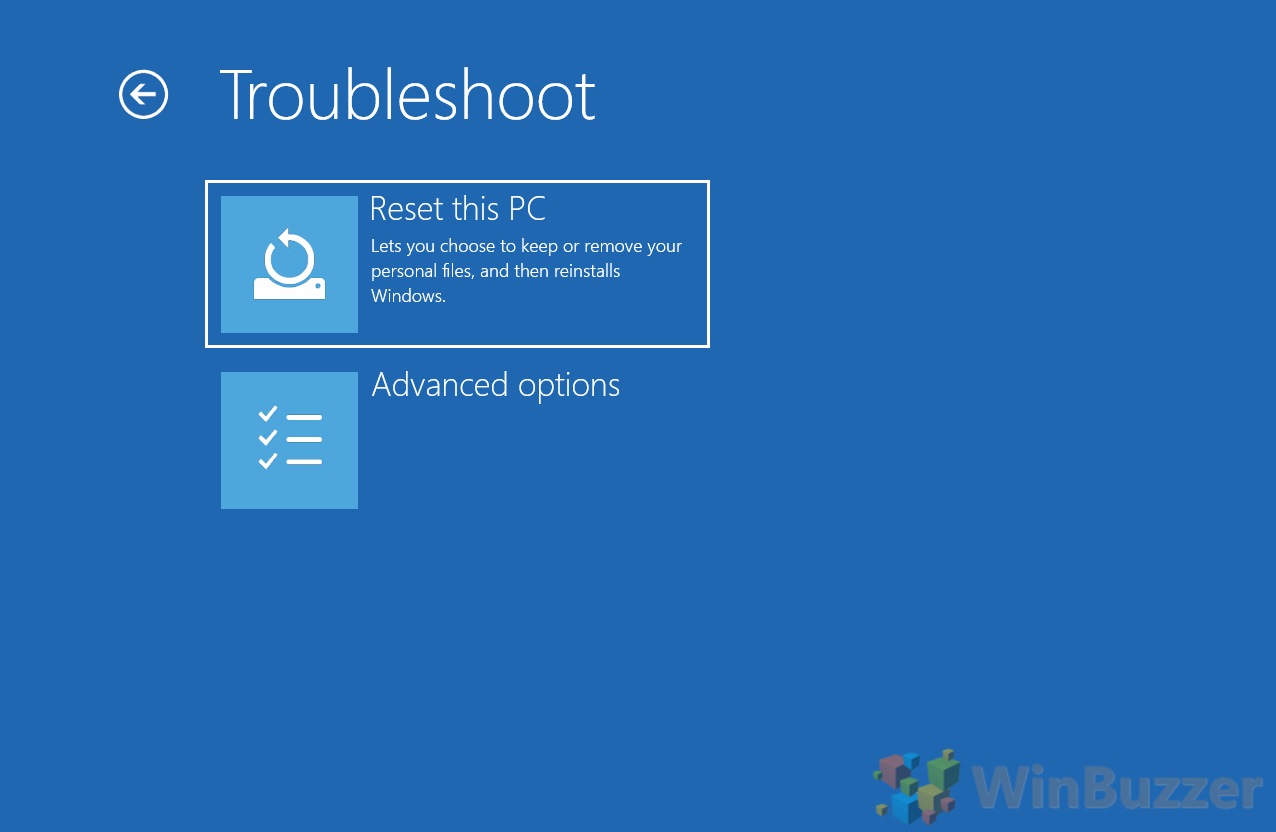
- Click “Troubleshoot” on the “Choose an option” screen

- Choose “Reset this PC”

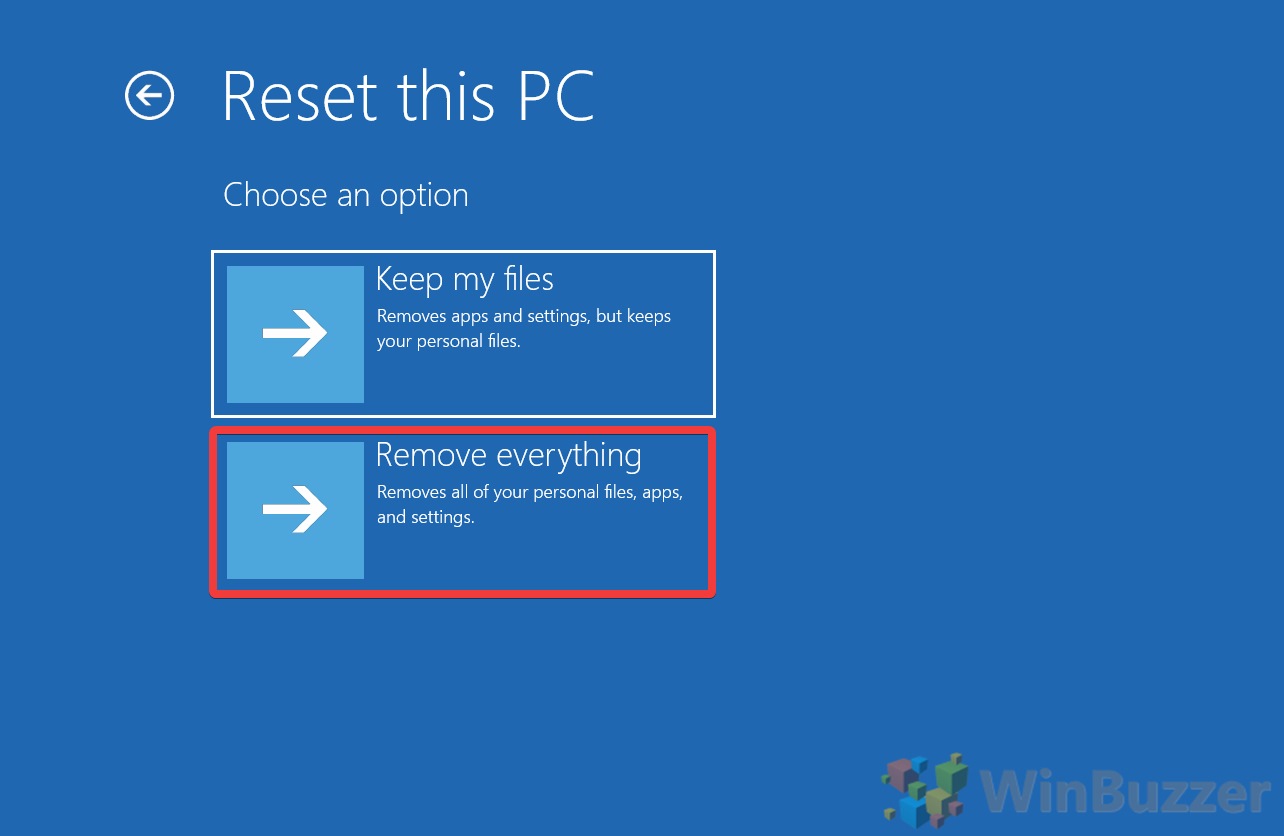
- Click “Remove everything”
The “remove everything” option will perform a factory reset for Windows 11, while the “Keep my files” option will allow you to retain some settings, apps, and files.
Generally, if you’re having serious issues with your PC, the “Remove everything” option has a greater chance of fixing your PC. This may also be the only option depending on the state of your OS.
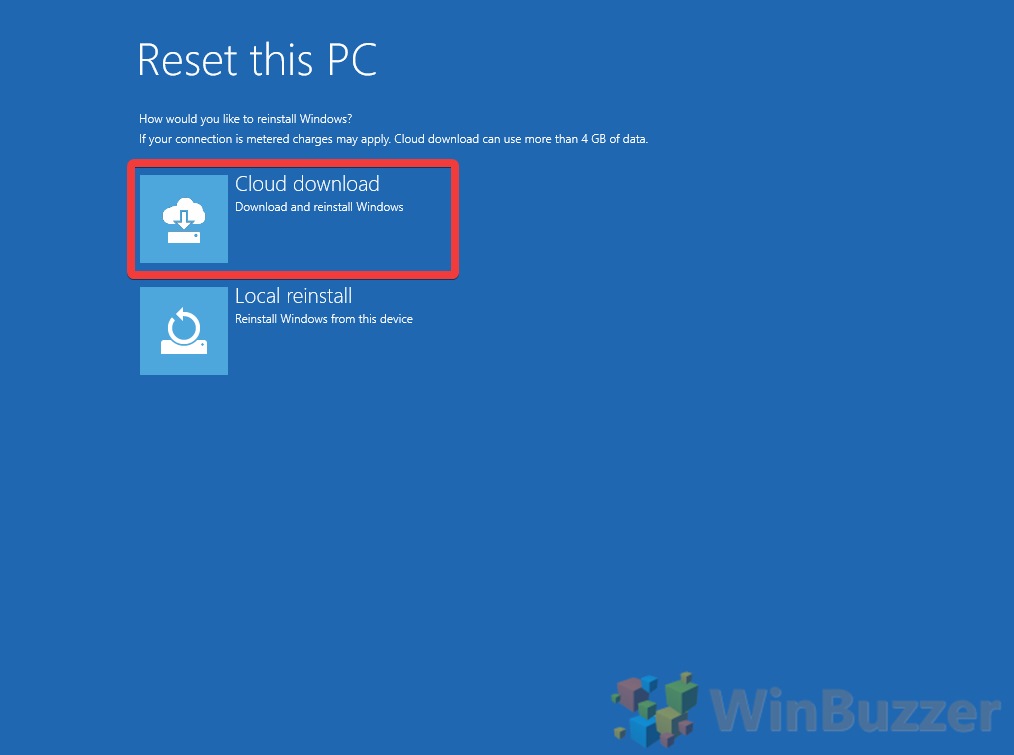
- Choose “Cloud download” or “Local reinstall”
The “Cloud download” option is very useful if you have the option. It downloads and installs windows from Microsoft’s servers rather than requiring recovery media.

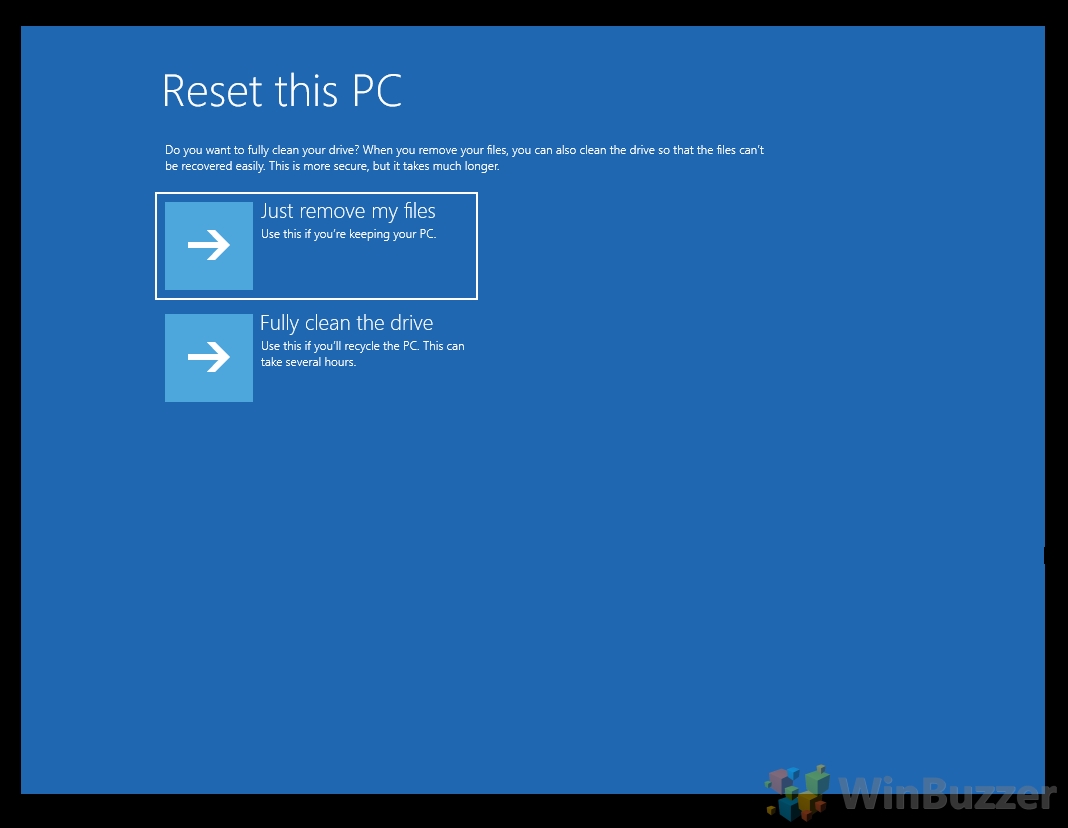
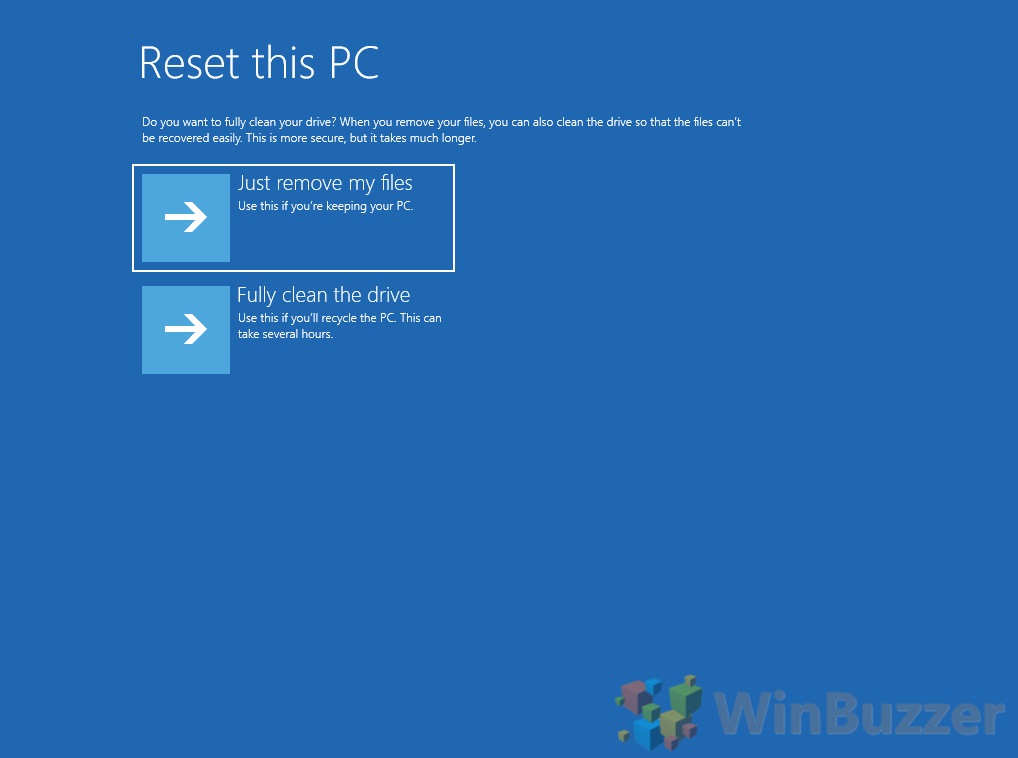
- Choose “Just remove my files”
Unless you’re selling your PC, there’s no need to full a clean of your PC, which is designed to make sure absolutely no data can be recovered.
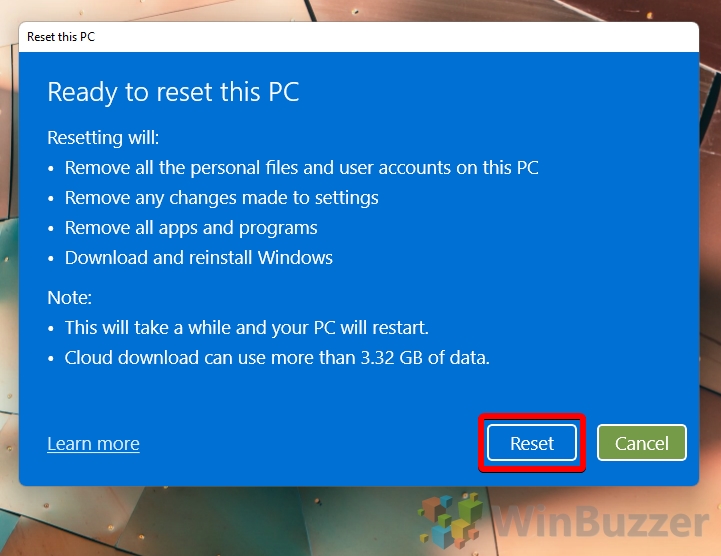
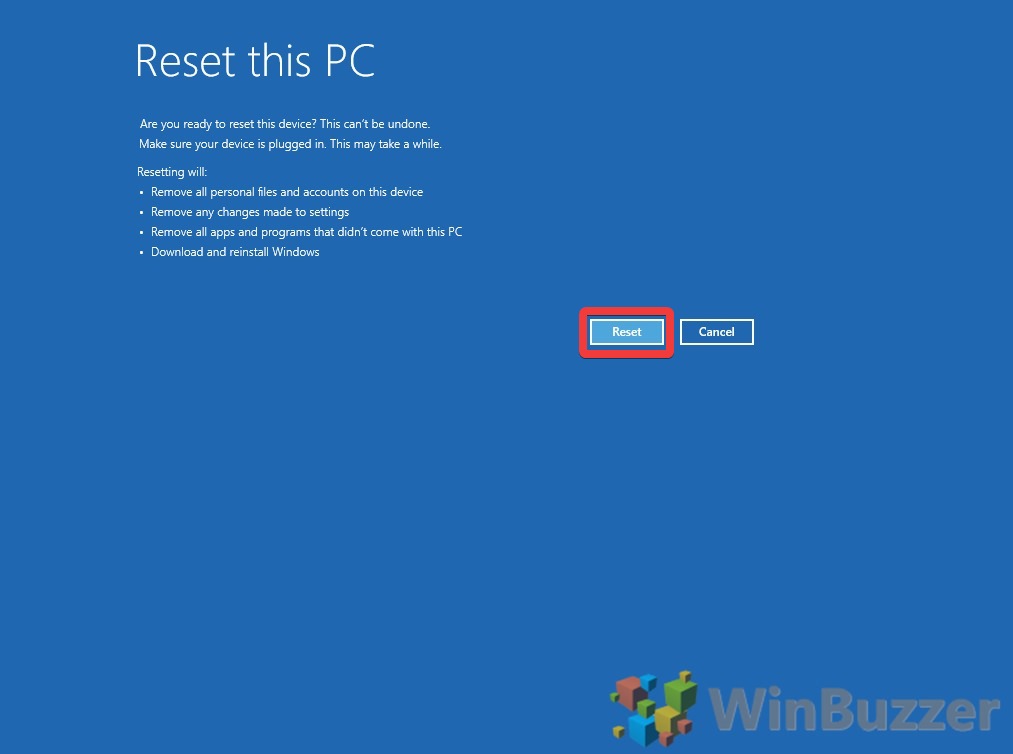
- Press “Reset”

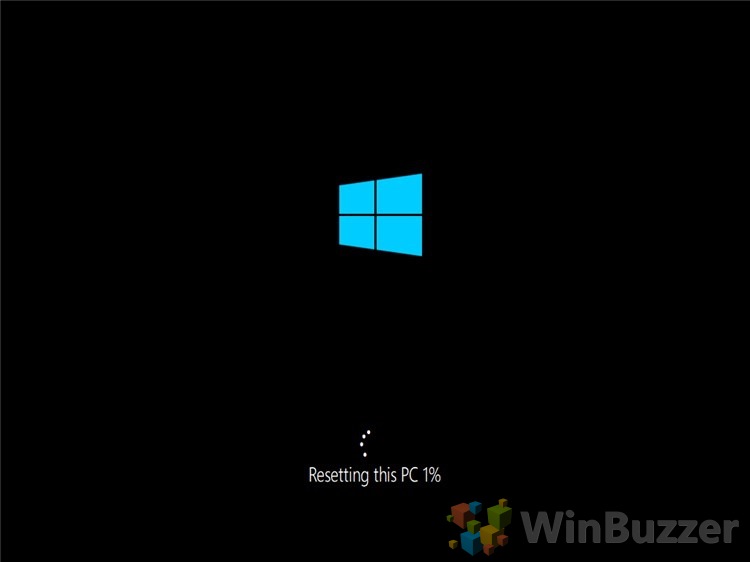
- Wait for the reset process to complete
This may take a while depending on your hardware, internet speed, and other factors.

How to Reset a Windows 11 Computer or Laptop via Settings
If you can still access your Settings app it’s generally easier to reset your computer through there. You won’t have to worry about getting to Advanced Startup Options and Microsoft will instead present you with a very simple process. Here’s how to factory reset Windows 11 in Settings:
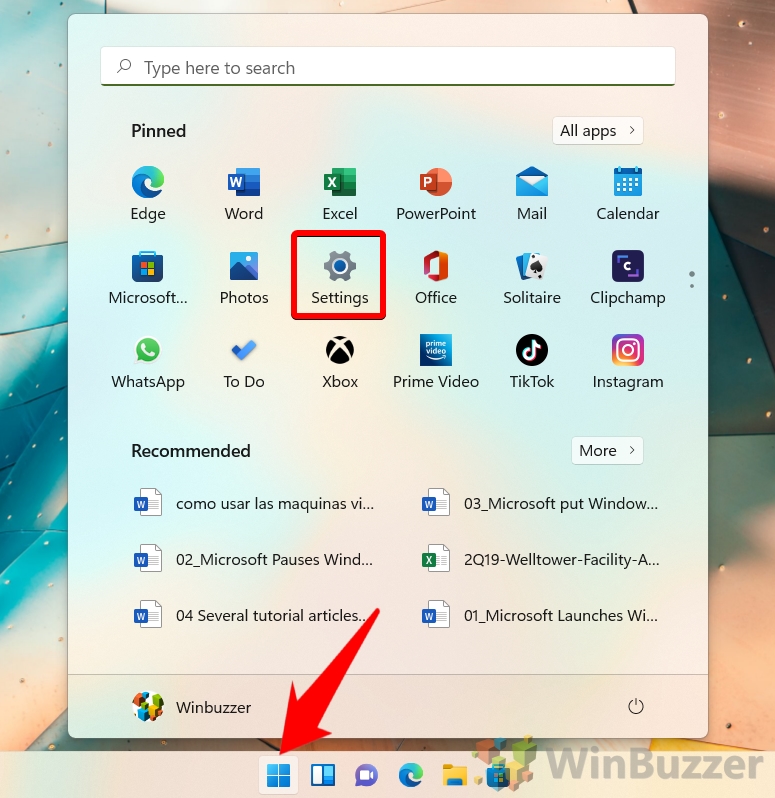
- Press the Start icon and click “Settings” in your pinned apps
If settings doesn’t appear for you, you can press “Windows + I” instead.
- Click “System” in the Settings sidebar, then “Recovery” in the main pane

- Press the “Reset PC” option under the “Reset this PC heading”
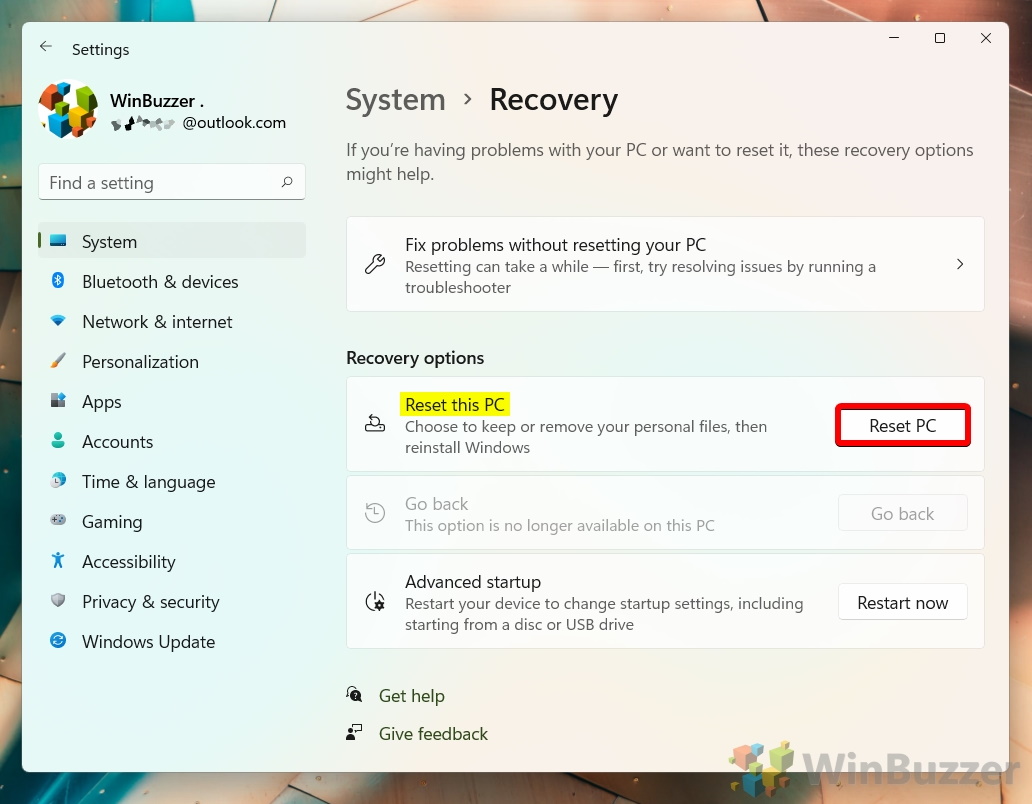
- Click on “Remove everything” to perform a Windows 11 factory reset
If you’d rather perform a regular reset, you can choose “Keep my files” instead, which will change your apps and settings to default but keep your documents, downloads, and other data.

- Press the “Next” button on the “Reset this PC” dialog

- Select “Cloud download” and wait for Windows to download your fresh install

- When the “Ready to reset this PC” heading appears, press “Reset”
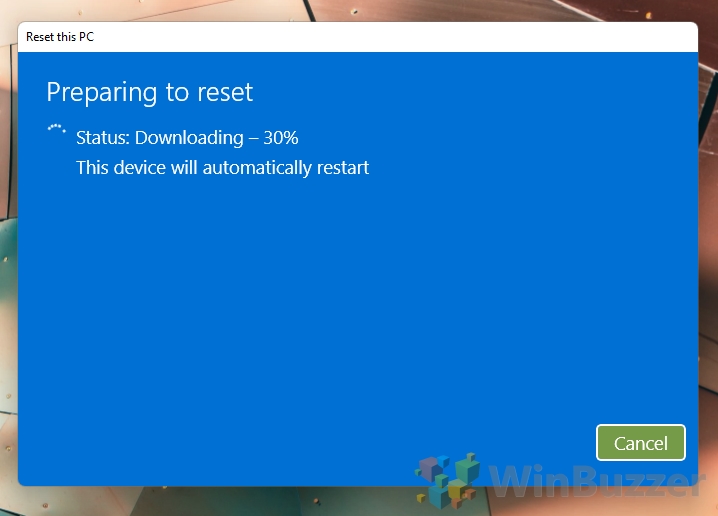
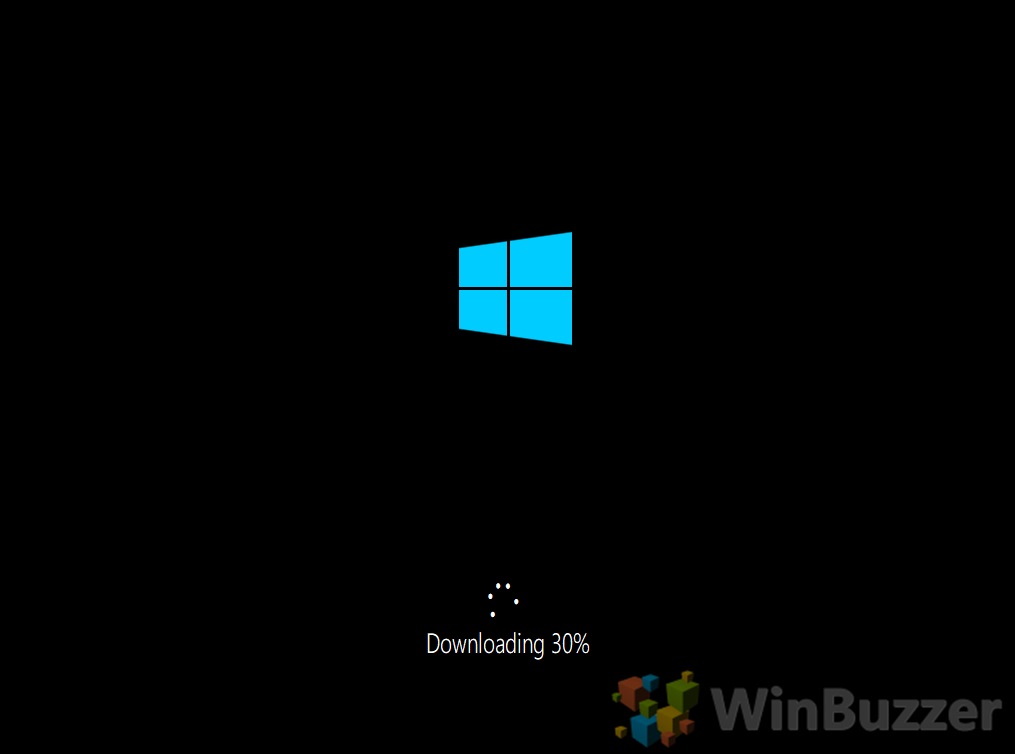
- Wait for Windows 11 to download your fresh files and restart your PC
If you’ve forgotten to back up any files, now is your last chance to hit “Cancel” and do so now.
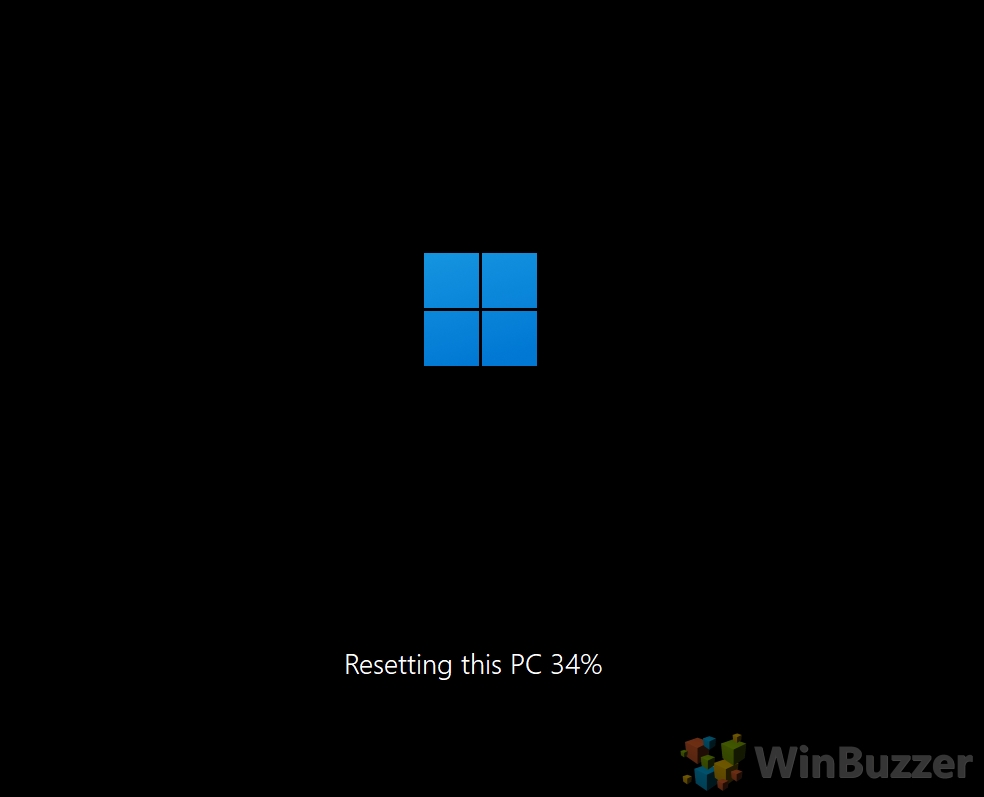
- Wait for Windows 11 to perform the reset
Your PC may restart several times during this process or get stuck on a particular percentage for a while. This is normal and we advise that you don’t turn off your PC during this period.
How to Factory Reset Windows 10 from Boot
The first step in a Windows 10 reset is accessing the “advanced startup options” menu. You can find various ways to do this in our dedicated tutorial. If you can access your Windows install, though, the easiest way is to hold the shift key when you press restart.
- Open Troubleshoot settings
The advanced startup options menu will greet you with the blue screen below. Rather than exiting to Windows 10, press “Troubleshoot”.

- Click “Reset this PC”
Starting the process is as simple as pressing “Reset this PC” in the Windows 10 troubleshooting menu.

- Choose whether to factory reset Windows 10
At this point you’ll be presented with the options we discussed earlier. You’ll have two or three options depending on whether your PC’s manufacturer has a dedicated Windows 10 factory reset option.
If you want to perform a Windows 10 reset without returning to the factory state, press “Remove everything”.
How to factory reset a laptop or computer
To perform a full factory reset of Windows 10 instead, press “Restore factory settings”. Be aware that we won’t be choosing this option in this tutorial, so your experience may vary slightly.

- Click “Cloud download”
This will grab the latest version of Windows 10 from Microsoft’s servers. This is often the more reliable method to reinstall Windows and can be faster depending on your internet speed.

- Choose whether to clean your drive
If your purpose is to fix an issue you’re having you can go ahead and press “Just remove my files” on the next screen. However, if you’re resetting the PC to sell it on, you should click “Fully clean the drive” to ensure all traces of your previous usage is gone. Just be aware that this could take a very long time.

- Perform your Windows 10 reset
Under the “Reset this PC” heading, Microsoft will inform you of the exact changes it will make to your device. Make sure you read this carefully to ensure you aren’t going to lose anything you need. If you’re not ready, cancel this step and backup your PC before continuing.
Once you’re ready, press the “Reset” button.

- Wait for Windows 10 to reset the PC
Unfortunately, we can’t give an estimated time here as it will largely depend on your internet and hard drive speeds. However, you should be aware that progress may appear stuck at times. In such instances, it’s best to wait at least half an hour before taking any further action. Turning off your PC during a reset process can lead to a difficult recovery process.

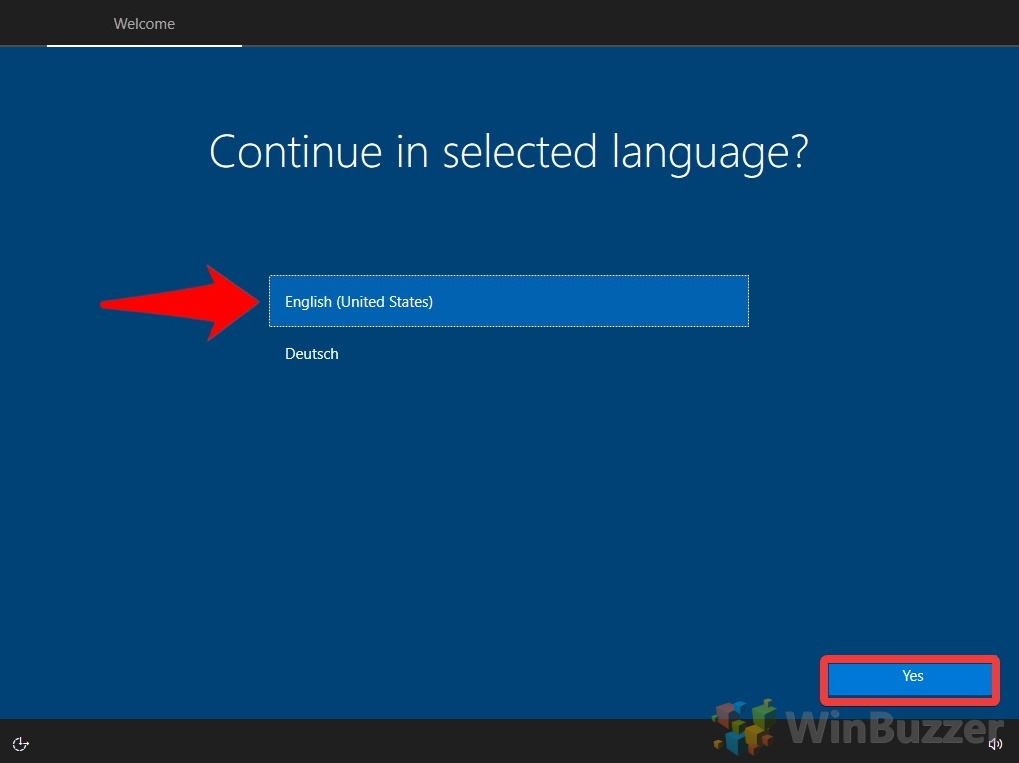
- Choose your keyboard language
Now that we’ve shown your how to reset a PC, it’s time to run through the setup process again. This starts with choosing your keyboard language. For us, that’s “English (United States)”. Press “Yes”.

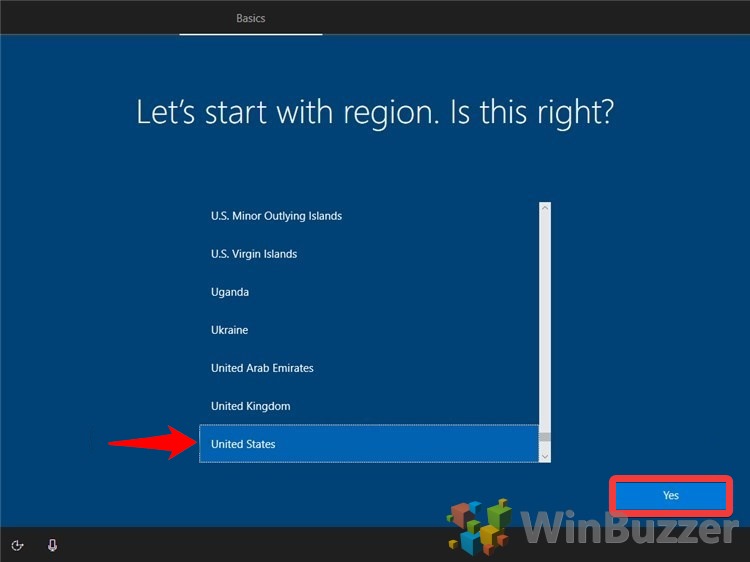
- Choose your Windows 10 region
Again, this is “United States” for us, but you should scroll down the list until you find the option that’s right for you and click it. Once you’re done, press “Yes”.

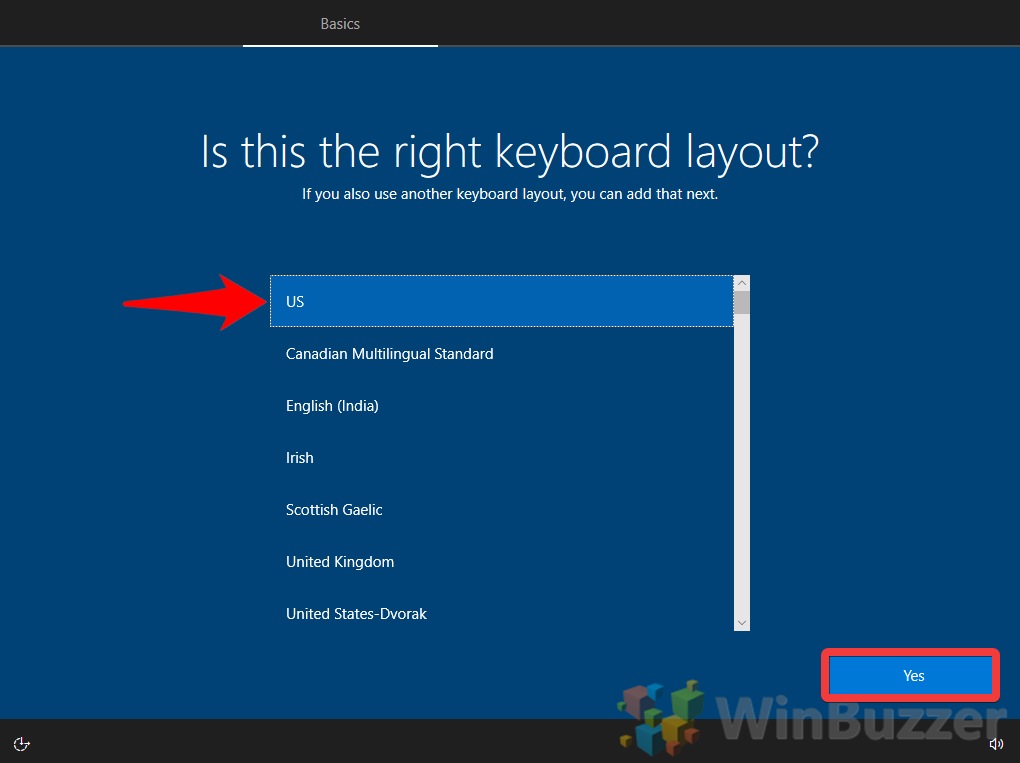
- Choose your keyboard layout
After you’ve chosen the correct option, press “Yes”.

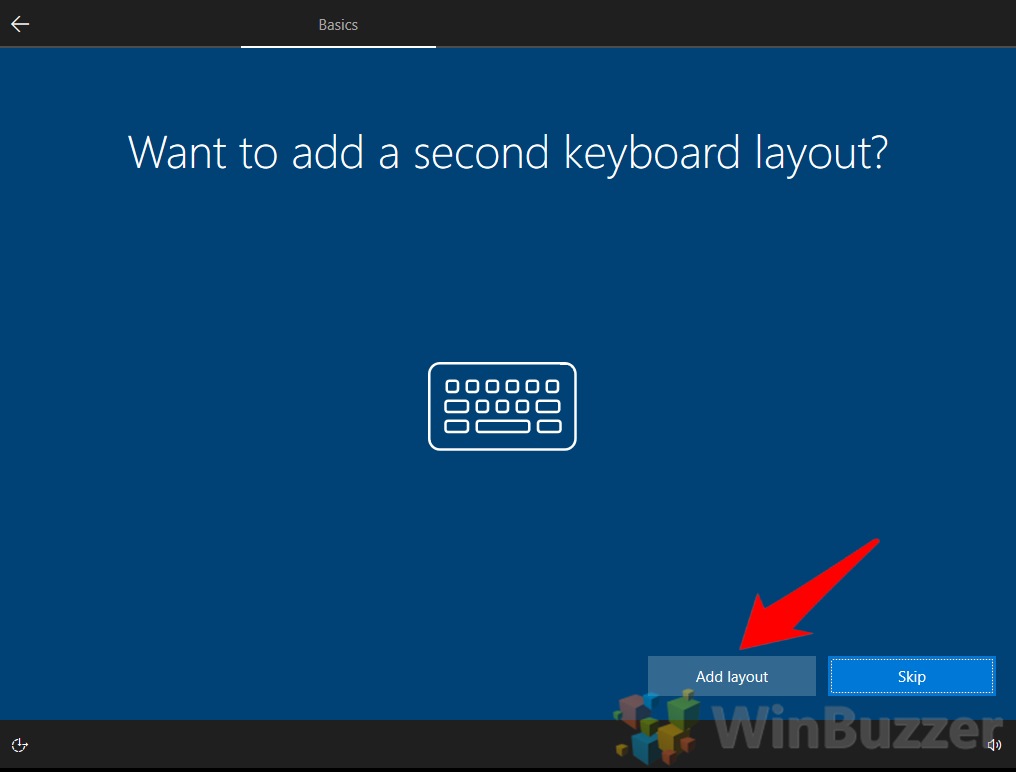
- Add a second keyboard layout if necessary
This option is especially useful for those who are multi-lingual or switch between the QWERTY layout and a different variant, such as Dvorak.

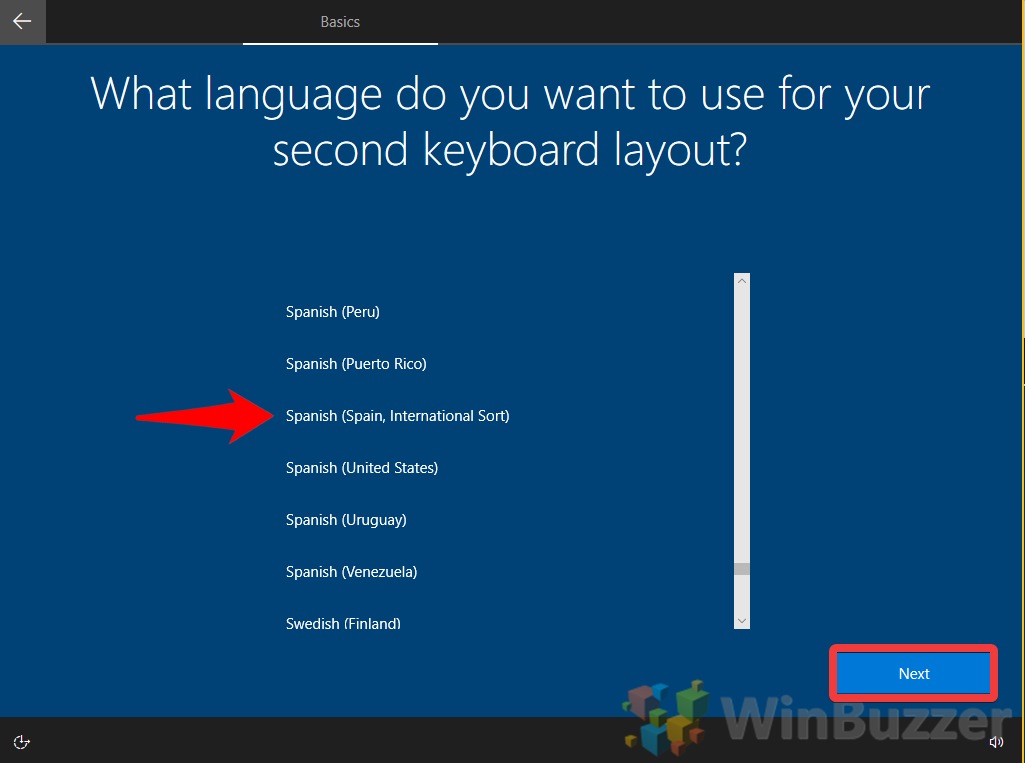
- Choose your second keyboard layout language

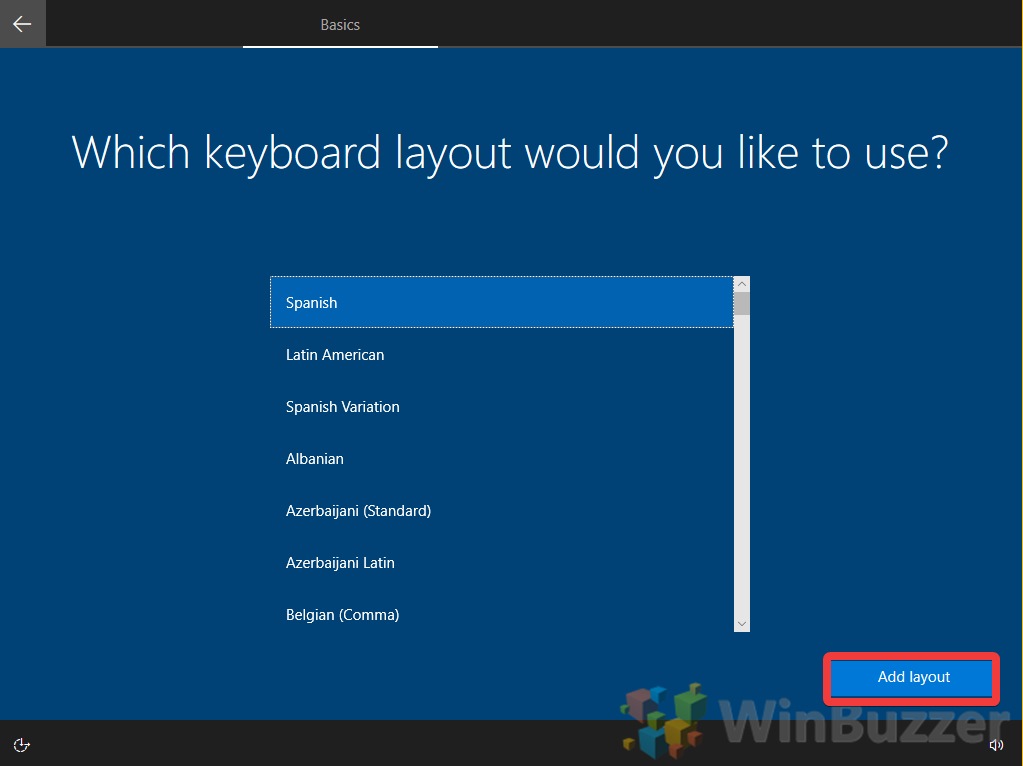
- Choose your second keyboard layout

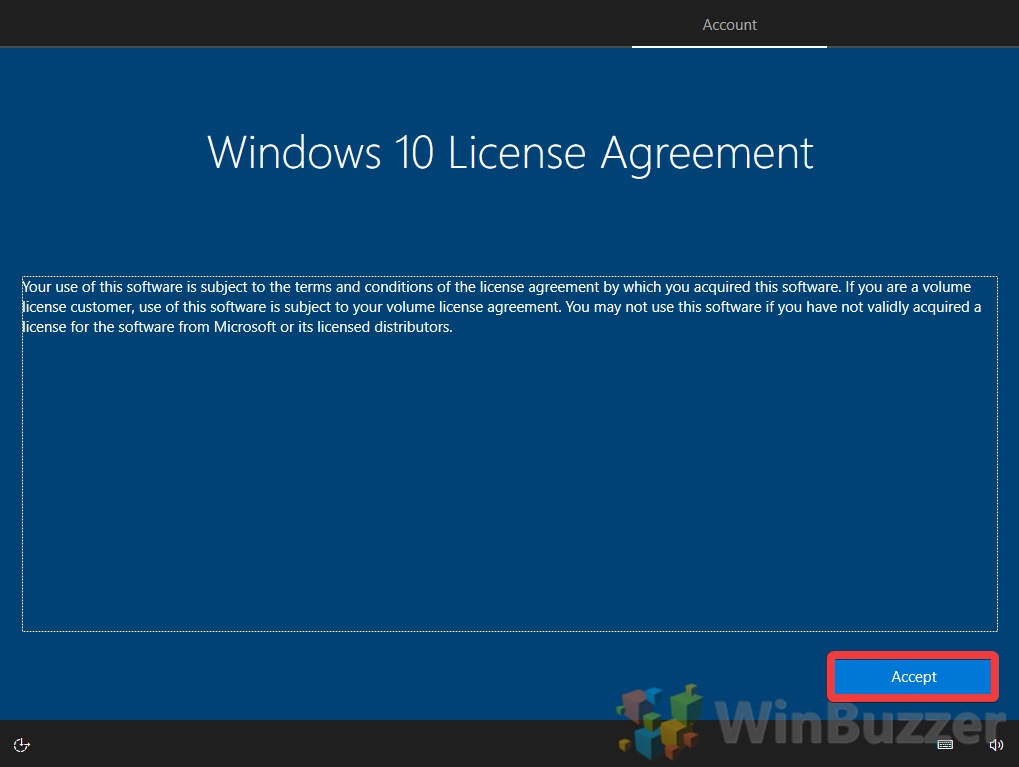
- Accept the Windows 10 License Agreement
If you’d like to read the full terms, you can find them here. As you’ve already been using Windows 10, we’re going to assume you agree with them. Click “Accept”.

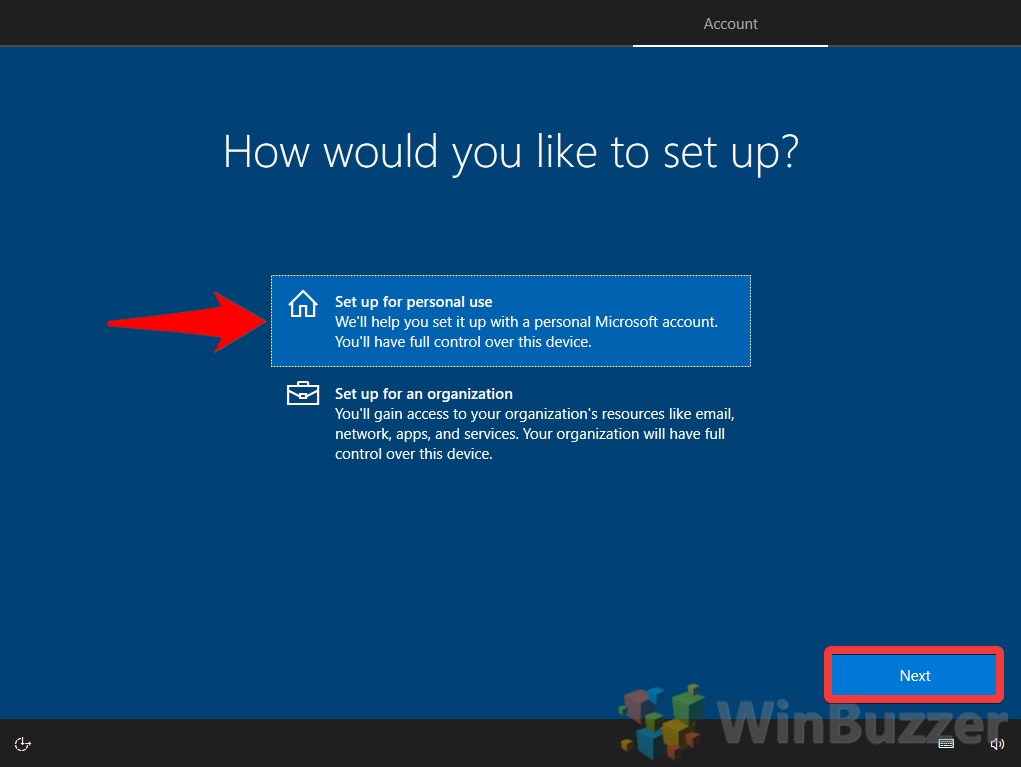
- Press “Set up for personal use” Then press “Next” in the bottom-right corner.

- Enter your Microsoft account email
To maintain your Windows 10 license, you should choose the email address you were previously using. You can always add another later. Press “Next”.

- Type your password
Bear in mind that this should be the password for your existing Microsoft account. You should not enter a new password, as it will just be rejected.

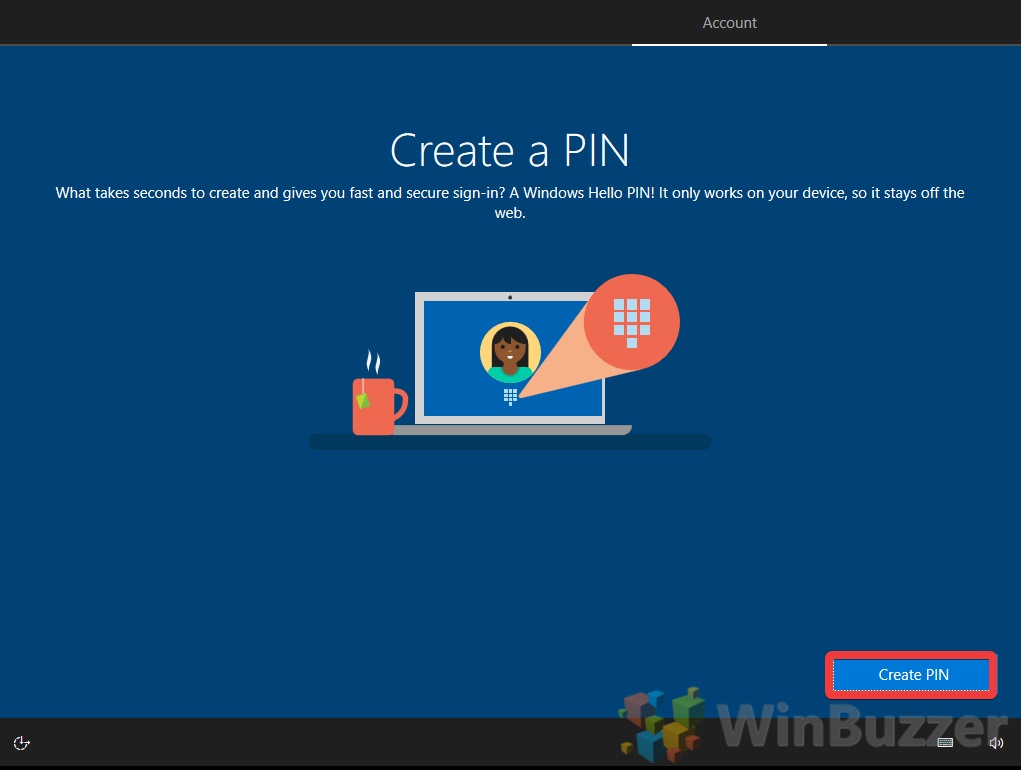
- Click “Create PIN”
A PIN code is part of Windows Hello, Microsoft’s authentication system. It can be used in place of a password for easier login.

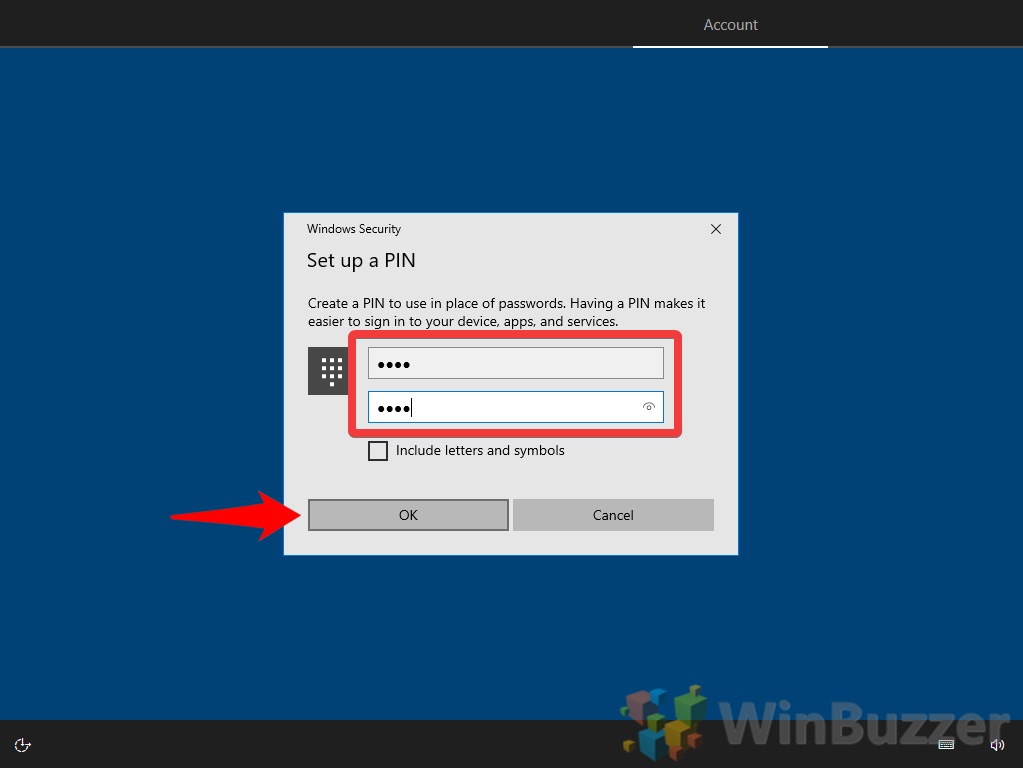
- Enter your desired PIN code
This does not need to be the same as your previous install, but doing so may aid your memory. Once you’re done, press “OK”.

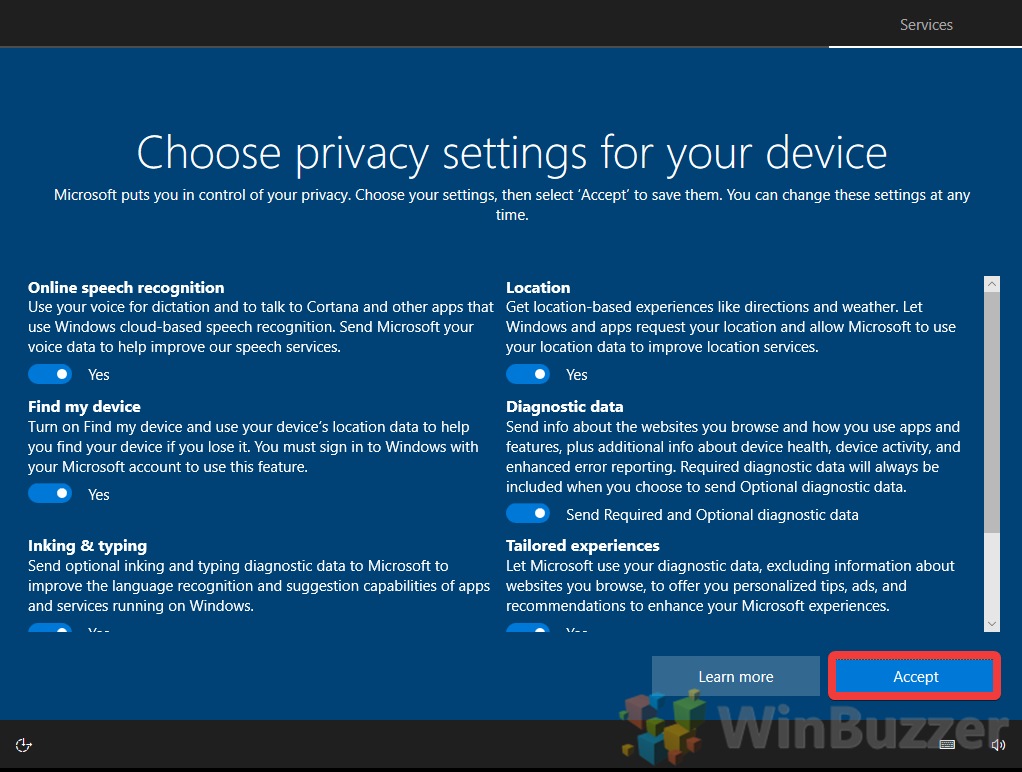
- Choose your privacy settings
You will have to read Windows 10’s privacy settings and decide for yourself whether you want certain features enabled. Just remember that providing Microsoft will analytics will help the company improve the OS.

- Customize your deviceNewer versions of Windows 10 will let you customize your device before you continue. Here you can choose what you’ll be using the computer for and Microsoft will install a suite of pre-installed apps based on those preferences. Once you’re done with your selection, press “Accept”.

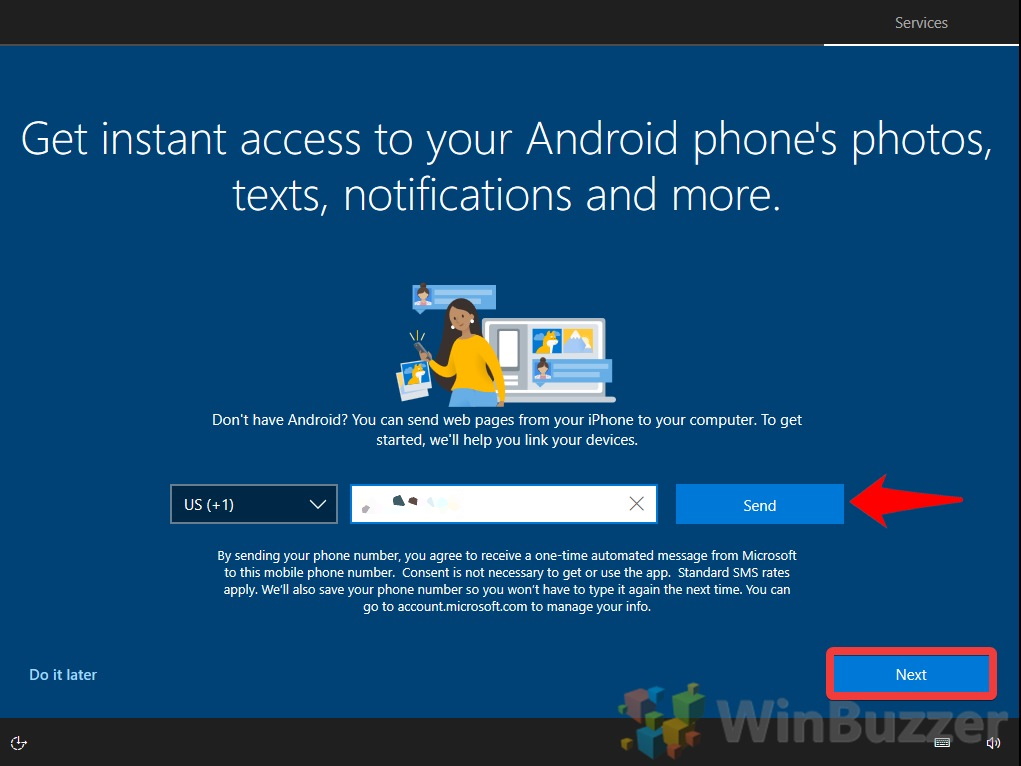
- [Optional] Set up Your Phone
Microsoft’s Your Phone service lets you sync photos, texts, and notifications directly to your Windows 10 PC. This cuts down on screen switching and can aid productivity. If you’re interested, enter your number and press “Send” and “Next”.
Otherwise, press the “Do it later” button to continue.

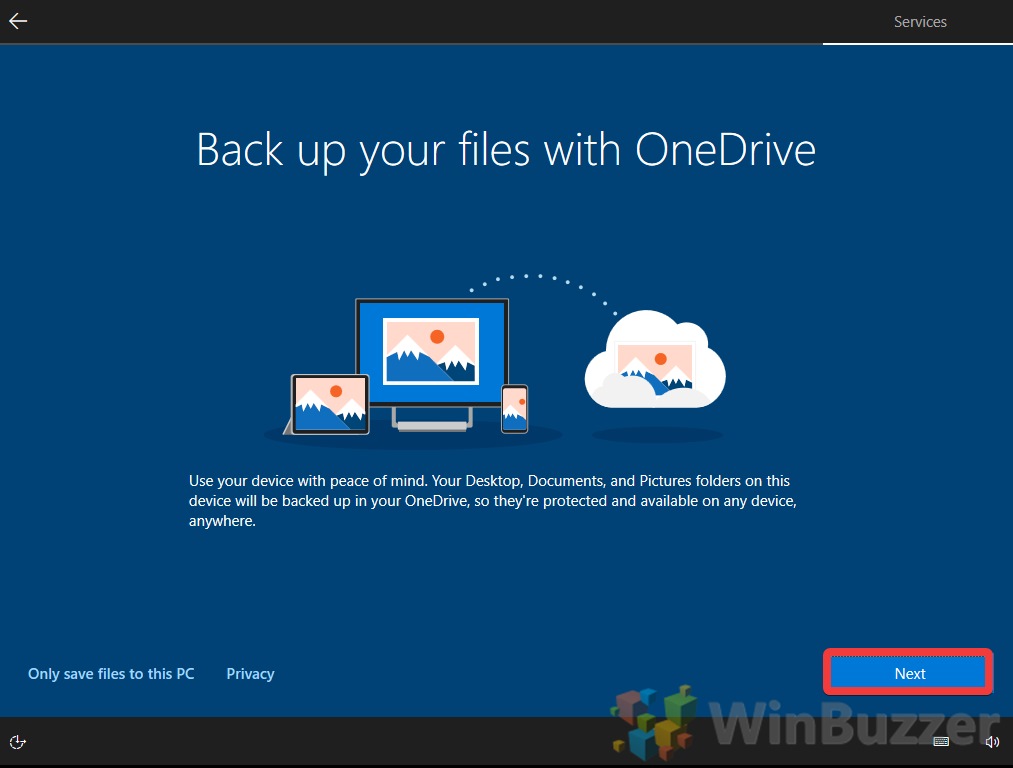
- [Optional] choose to back up your files with OneDrive
Pressing “Next” here will automatically sync your documents and other important files to Microsoft’s cloud solution to save you if your local files get corrupted or damaged. If you’re fine with that risk, press “Only save files to this PC” instead.

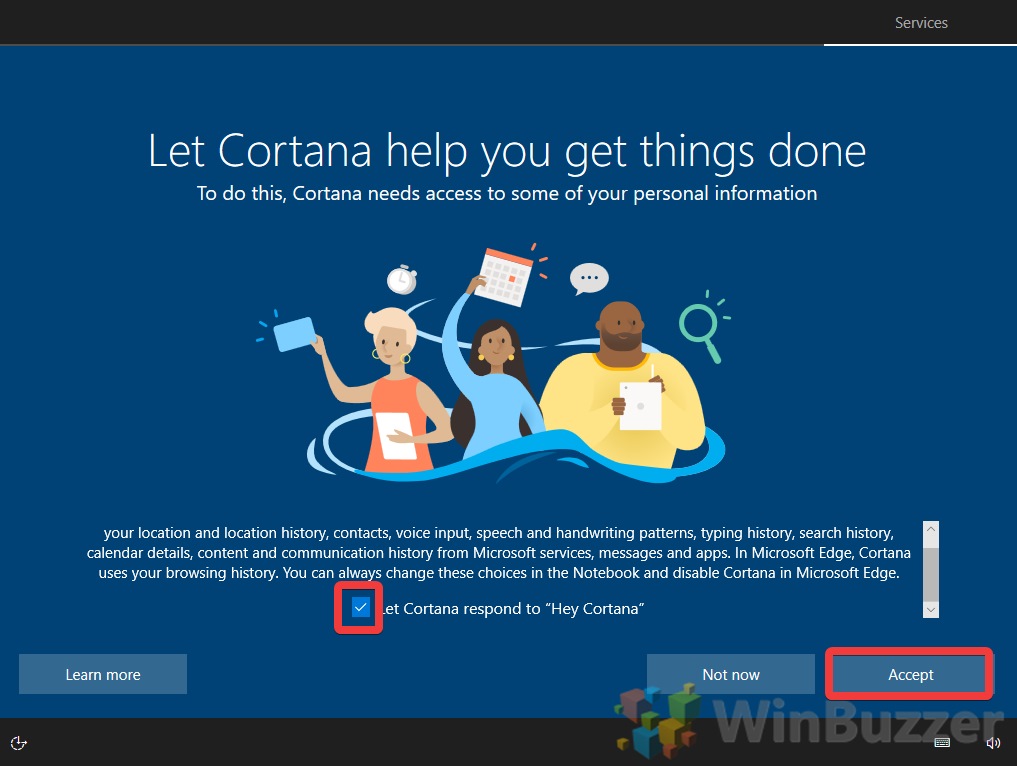
- [Optional] Set up Cortana
Cortana isn’t as popular as she used to be, but the virtual assistant can still be handy for some people. If you’d like to enable her, tick ‘Let Cortana respond to “Hey Cortana”‘, and then click “Accept”.
Alternatively, press “Not now” to skip this step. Whatever your choice, you’ll be taken to your fresh Windows 10 desktop from here.


How to Reset a Windows 10 Computer or Laptop via Settings
If you still have a functioning version of Windows, you don’t need to mess around in Advanced Startup Options to perform your Windows 10 reset. Instead, you can make use of the OS’ inbuilt settings app.
-
Open settings
Press Start, then click the settings cog in the bottom-left corner, above the power button.

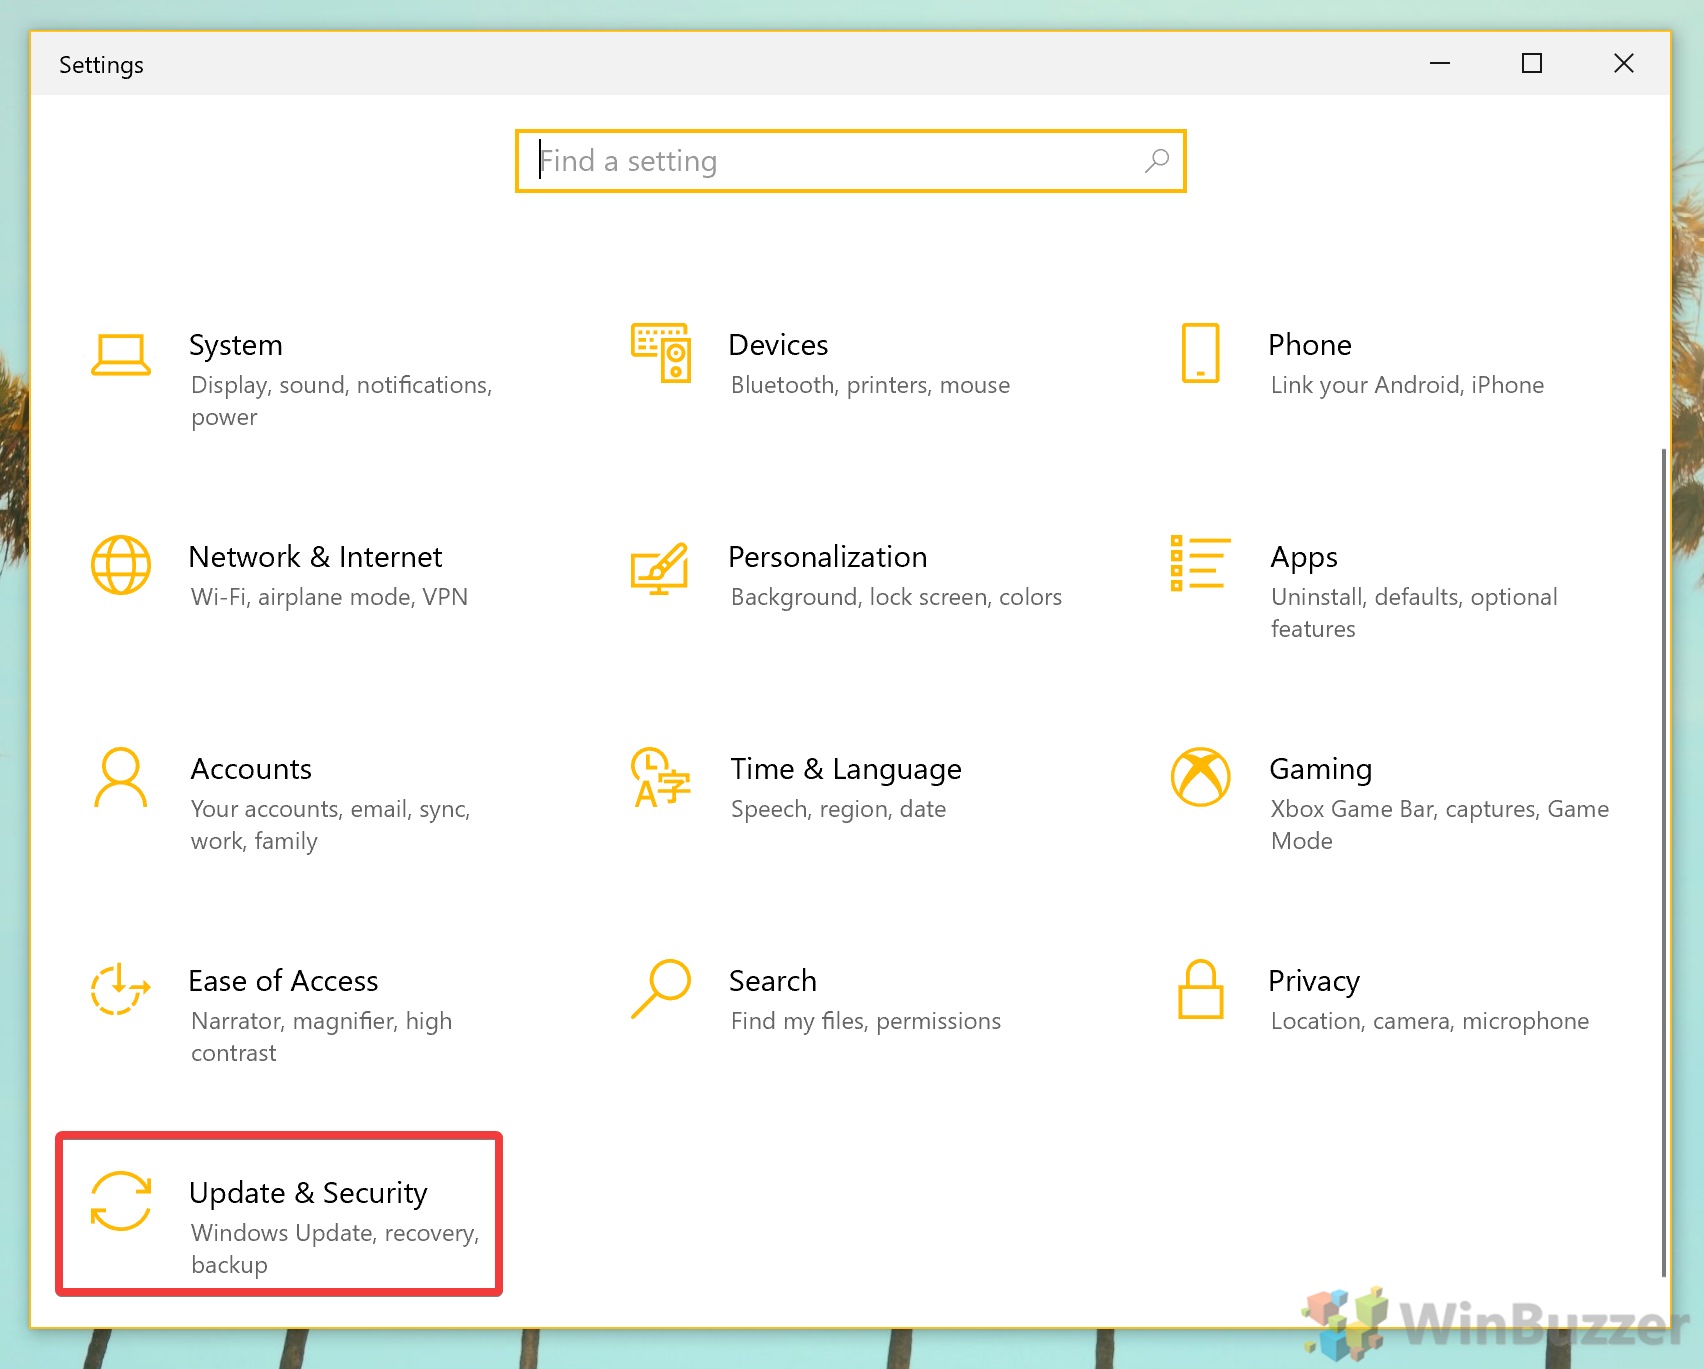
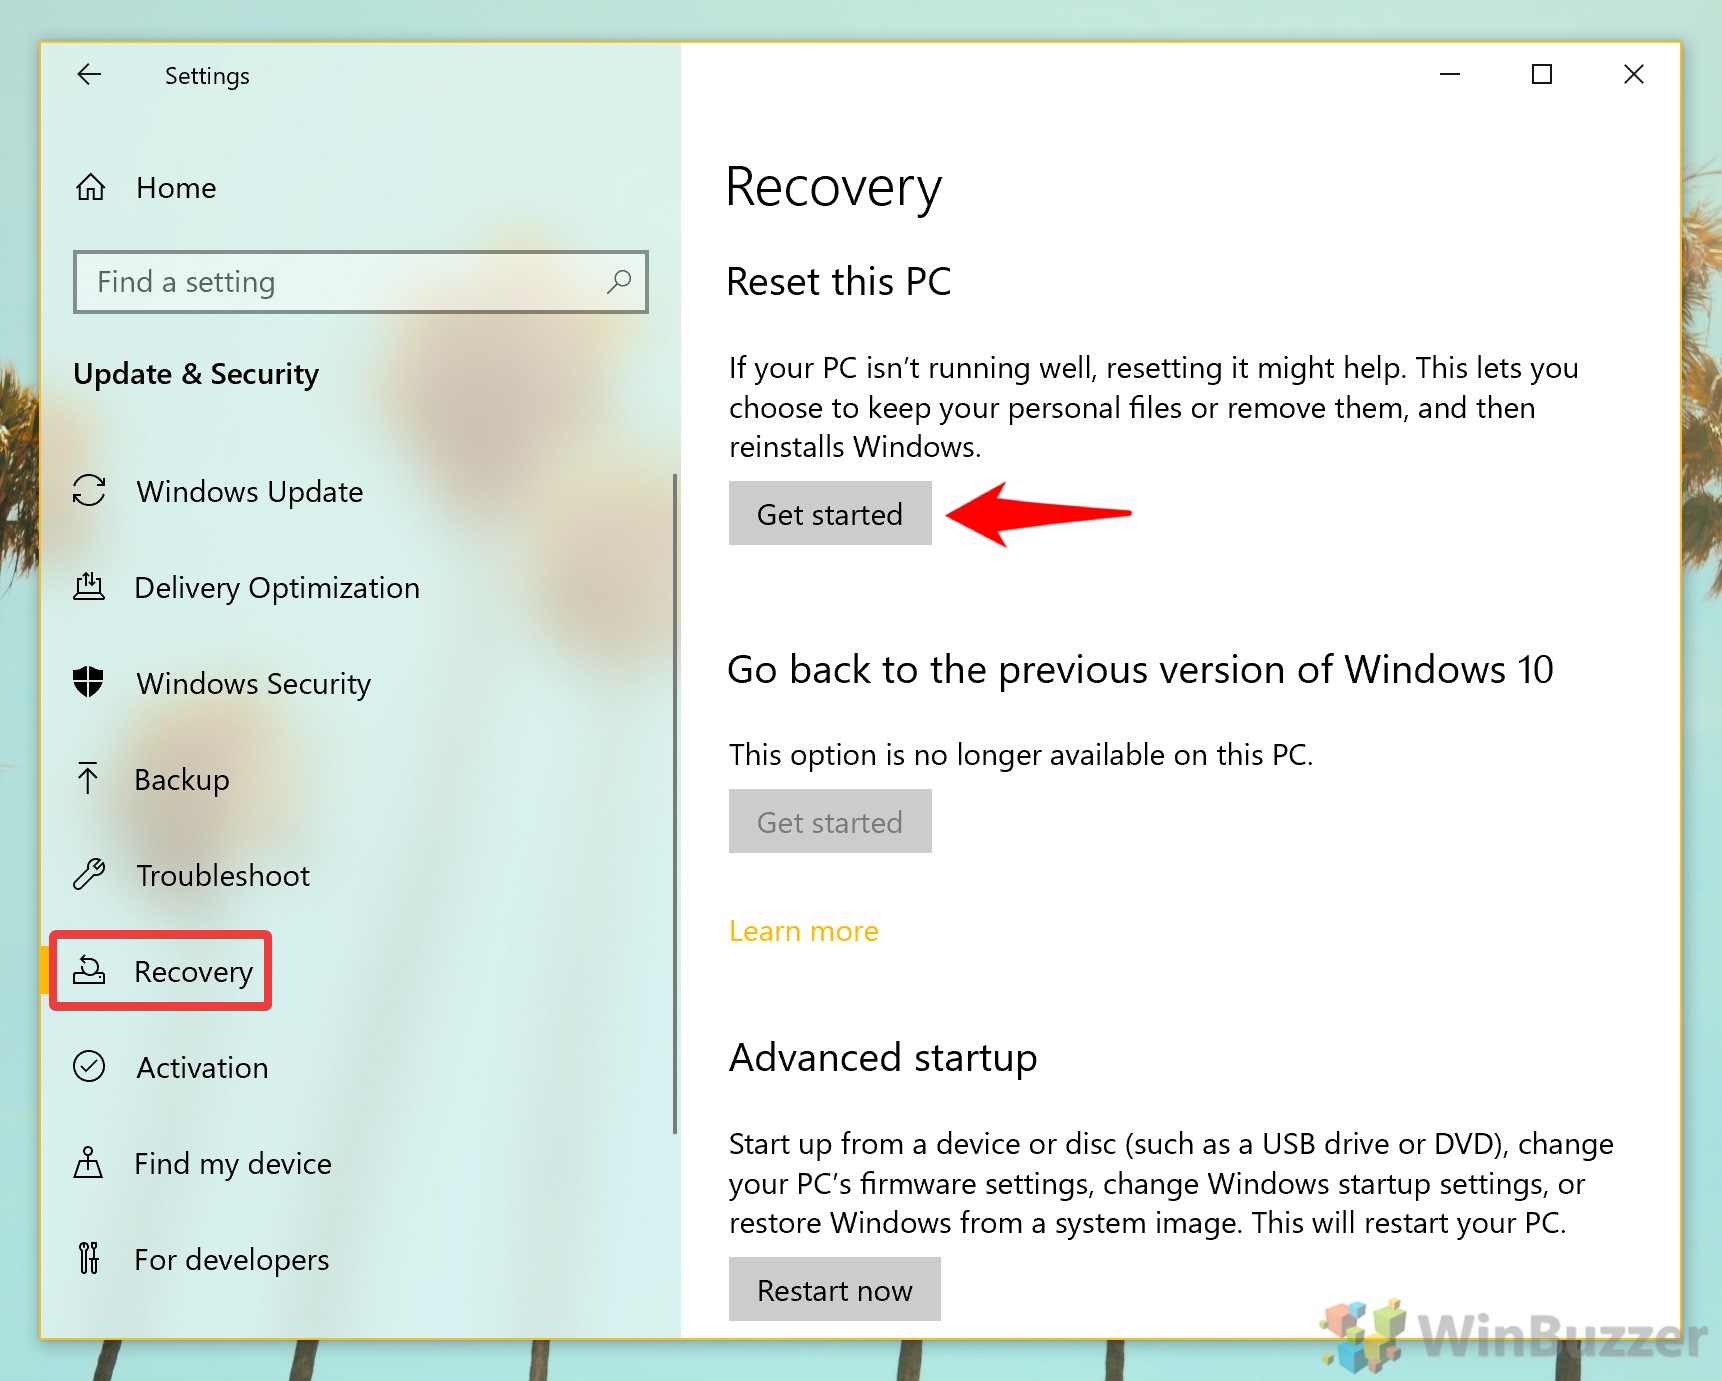
- Click ‘Update & Security’

- Start the Windows reset process
Press the “Recovery” heading in the left sidebar, then look for the “Reset this PC” heading in the main pane. Press the button underneath that says “Get started”.

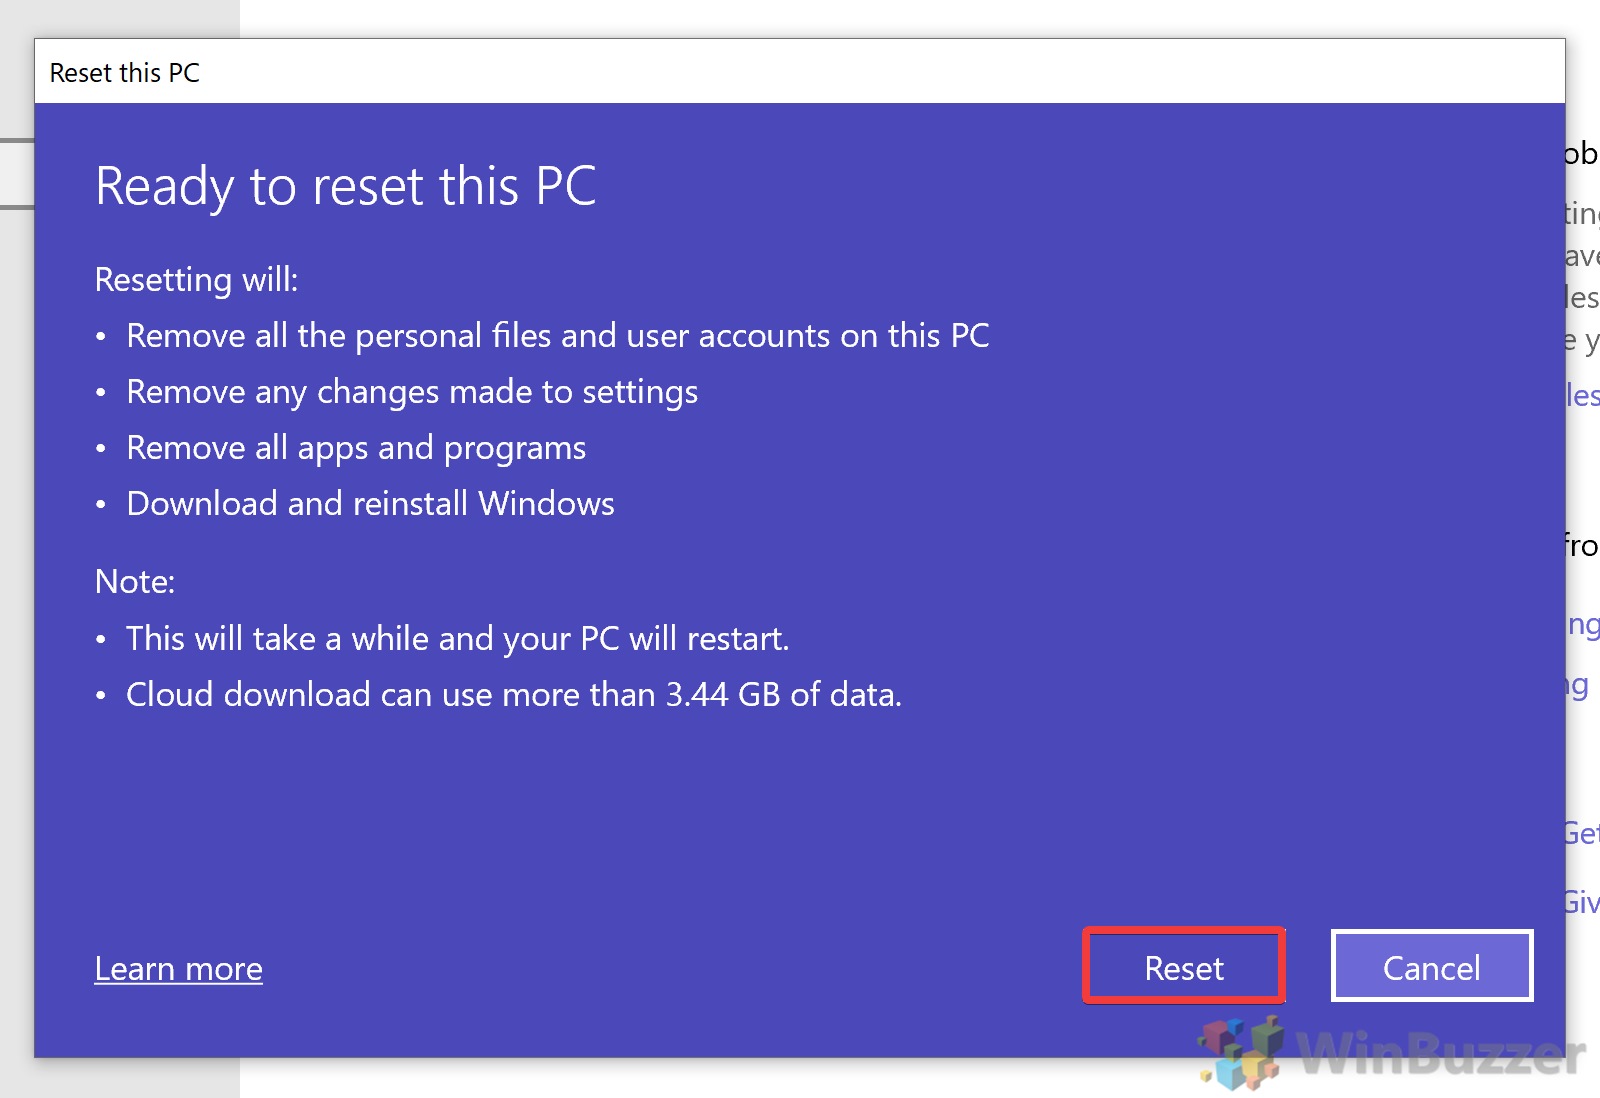
- Choose whether to factory reset Windows 10
You’ll be presented with two or three options in the pop-up menu, as discussed earlier. “Keep my files” won’t fully reset your PC, so you shouldn’t choose that unless you understand the difference. “Remove everything” will fully wipe your PC and reinstall the latest version of Windows 10. This is the option we’ll be choosing.
Refresh Windows 10 or Factory reset Windows 10If you’d prefer to go back to the state your PC or laptop was in when you bought it, you may have an option named, “Restore factory settings”. You can choose this if you prefer, but you may want to update your PC again afterwards.

- Click ‘Cloud download’This will grab a recent version of Windows 10 from Microsoft’s servers, and tends to be more reliable at solving issues than a local upgrade. Just bear in mind that this will use bandwidth if you’re on a metred connection.

- Press ‘Next’ in the additional settings windowFirst, though, be sure you’re happy with the changes Windows is going to make. You can press “Change settings” if you aren’t.

- Click ‘Reset’

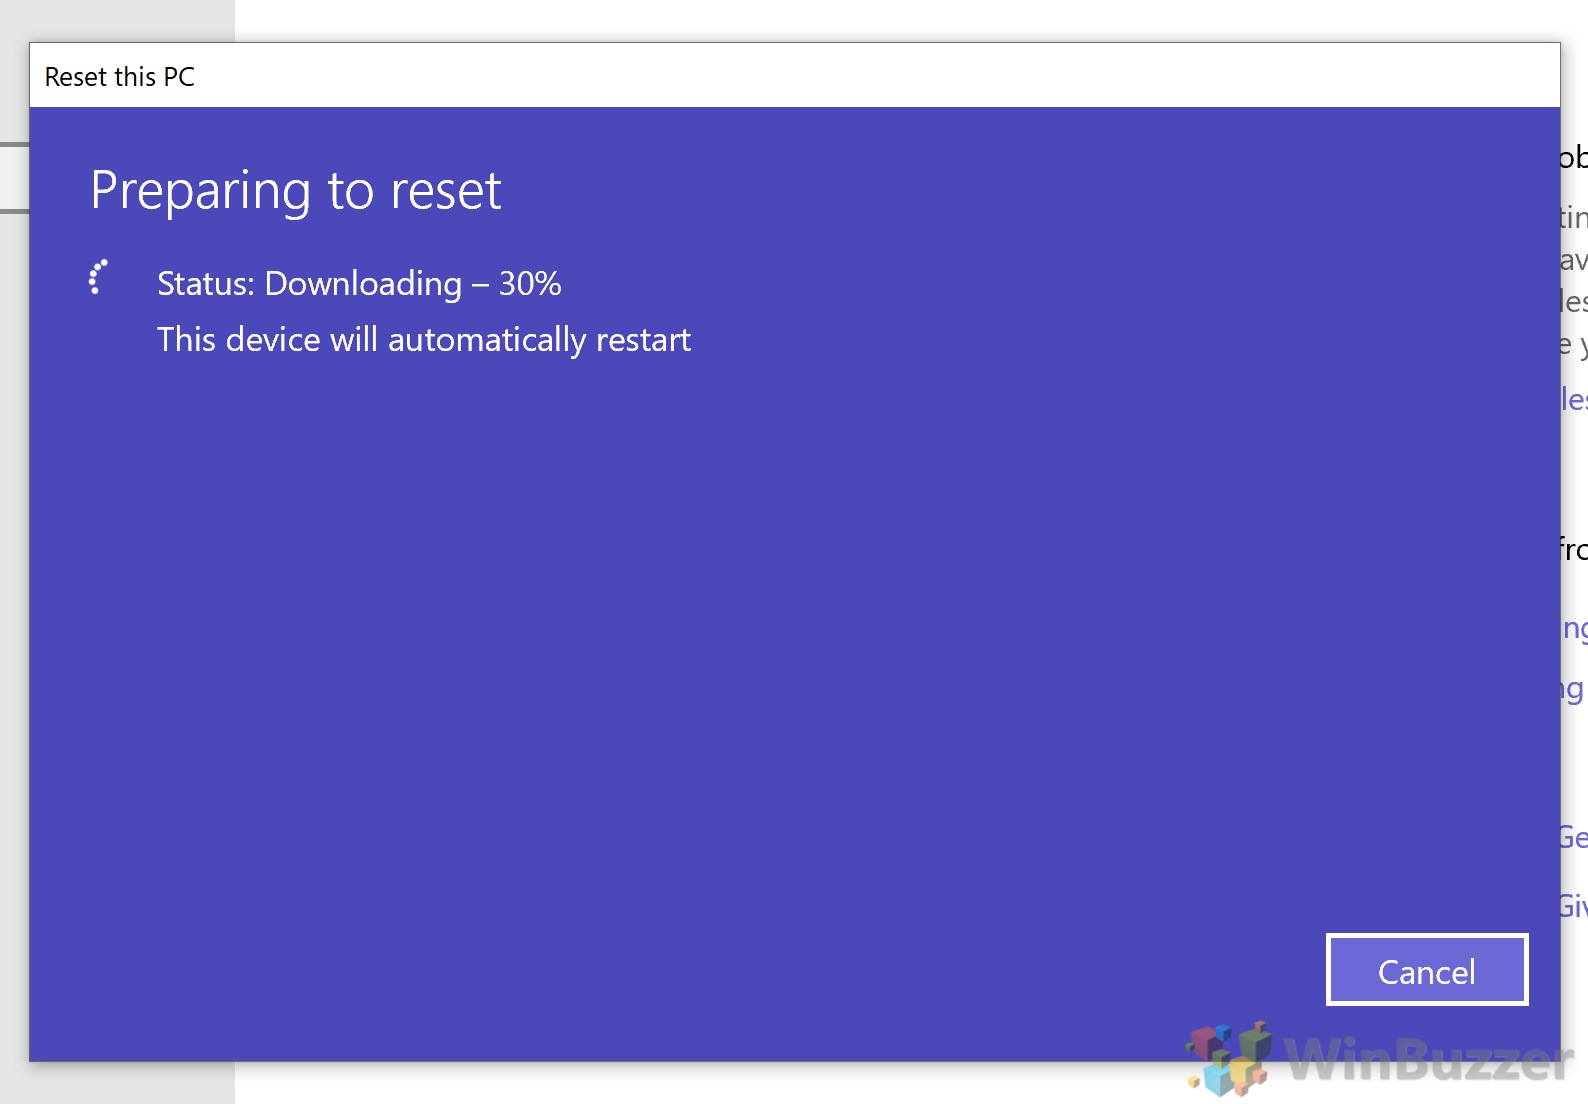
- Wait for a fresh version of Windows 10 to download
Depending on your internet speeds, this could take a while. However, you won’t need to babysit it – Windows 10 will automatically restart and reset your PC once it’s done.

- Wait for your PC to reset
You may have to perform some additional setup once this process is complete.


Related Tutorials
Now that you know how to factory reset Windows 11 and Windows 10, you can go into your new install better armed to find and fix problems in the future. Hopefully, this will prevent you from needing to take such drastic action in the future. Here are some tutorials that may be of use if you’re having issues with your PC in the future:
How to Reset and Repair Windows Apps

If your Windows 10 or 11 Apps aren’t opening, there’s rarely a need to perform a full reset. Instead, you can follow our reset and repair guide, which should be suitable for Windows 11 and Windows 10 use cases.
How to Clear and Reset the Microsoft Store Cache

If the problem is with the Microsoft Store in Windows 10 or 11, rather than specific apps, you can reset that, too. Just follow our dedicated guide to clear and reset the Microsoft Store cache.
How to Use DISM and SFC Scannow to Repair Windows 11 and Windows 10
 If Windows 10 or Windows 11 is corrupted but you can still access it, there are steps you can take to remedy it that involve a reset. The DISM and SFC tools look at your system files and replace them if any are found to be problematic. You can check our guide on how to use DISM and SFC Scannow here. The commands will be the same regardless of the Windows version you are on.
How to Clean the WinSxS Folder in Windows 11 and Windows 10

If your intention behind the reset is to free up space on your OS drive, there are plenty of other tricks you can turn to first. You may want to clean your WinSxS folder, for example, to remove components from old Windows versions.
How to Create a Custom, Updated Windows 10 / Windows 11 Recovery Partition

Last but not least, we strongly recommend that you learn how to create a custom Windows 10 or Windows 11 recovery partition. If you play your cards right, this could stop you from ever needing to factory reset your computer again. Instead, you can just restore from your backup and lose minimal files and progress.
Advertisement